How to Install a Bathroom Ventilation System
Proper ventilation is essential in any bathroom to prevent the buildup of moisture, mold, and unpleasant odors. Installing a bathroom ventilation system can help maintain a healthy and comfortable environment. In this article, we will guide you through the process of installing a bathroom ventilation system, providing valuable insights and step-by-step instructions.
Why is Bathroom Ventilation Important?
Before diving into the installation process, it’s crucial to understand why bathroom ventilation is important. Bathrooms are prone to high levels of humidity due to activities like showering and bathing. Without proper ventilation, this moisture can accumulate on surfaces, leading to mold growth, peeling paint, and even structural damage. Additionally, a well-ventilated bathroom helps eliminate unpleasant odors and improves air quality, creating a more comfortable space for users.
Types of Bathroom Ventilation Systems
There are several types of bathroom ventilation systems available, each with its own advantages and installation requirements. The most common types include:
- Exhaust Fans: These fans are installed in the ceiling or wall and work by drawing out moist air from the bathroom and expelling it outside. They are highly effective in removing humidity and odors.
- Window Fans: These fans are mounted on a window and operate by pulling air from the bathroom and pushing it outside. While they can be effective, they rely on an open window for proper ventilation.
- Heat Recovery Ventilators (HRVs): HRVs are more advanced systems that not only remove moist air but also recover heat from the outgoing air and transfer it to fresh incoming air. They are ideal for energy-efficient homes.
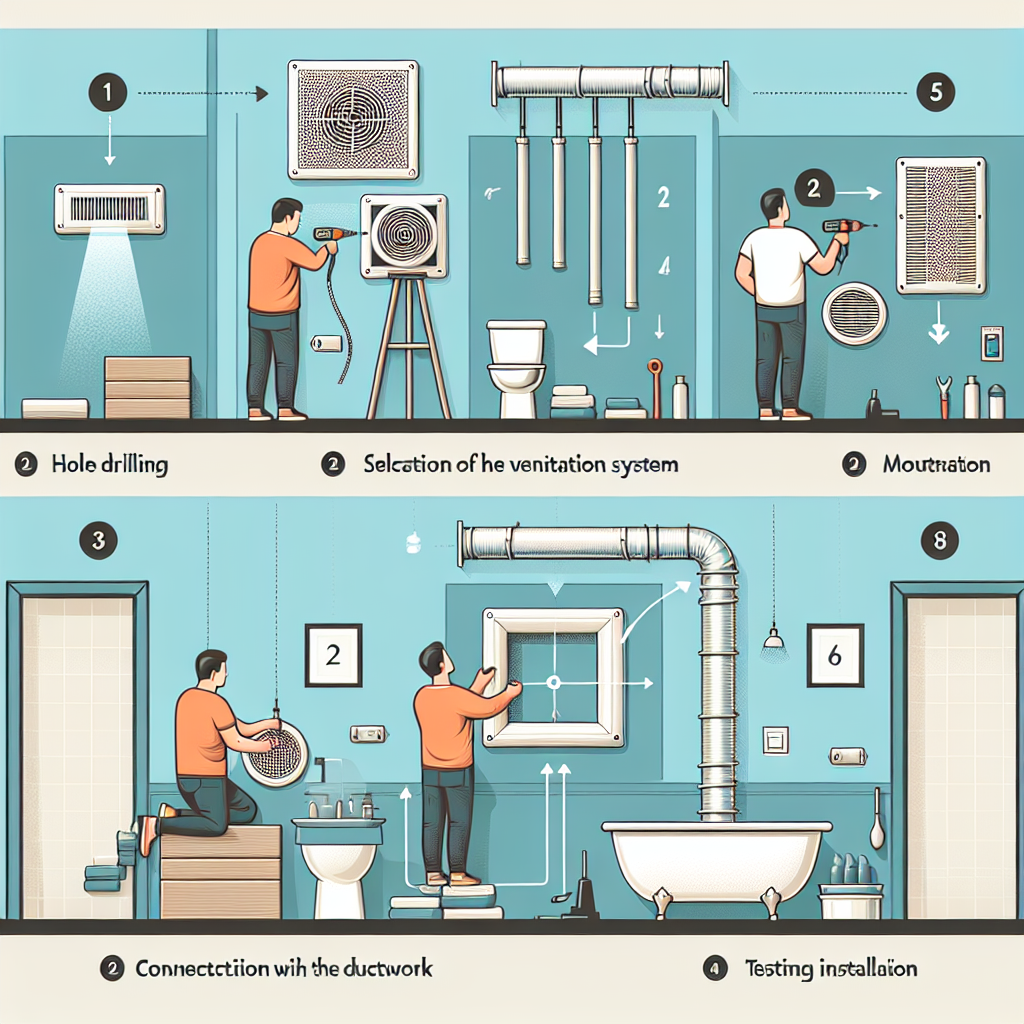
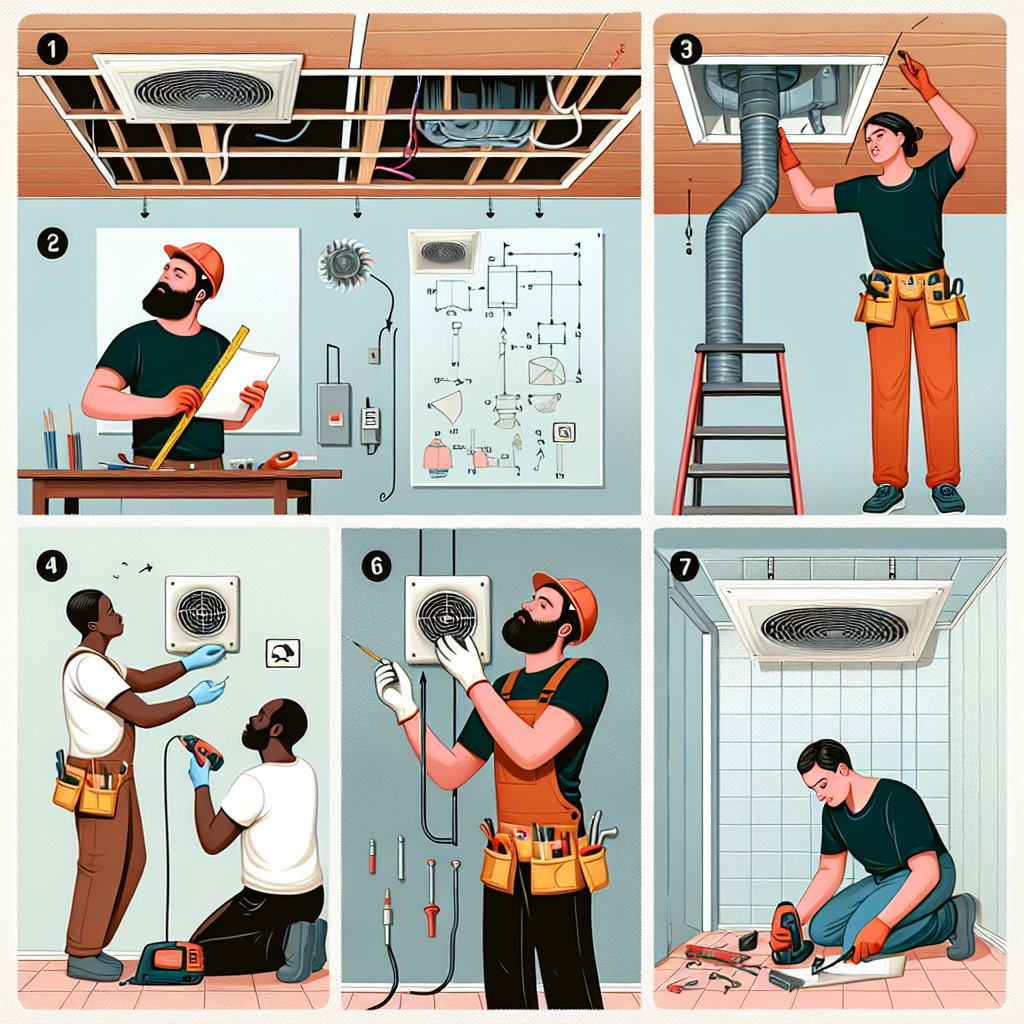
Step-by-Step Guide to Installing a Bathroom Ventilation System
1. Determine the Ventilation Needs
Before purchasing a ventilation system, assess the size of your bathroom and the specific ventilation requirements. Consider factors such as the bathroom’s square footage, the number of fixtures, and the level of humidity generated. This information will help you choose the right size and type of ventilation system for your needs.
2. Select the Right Ventilation System
Based on your assessment, select the appropriate ventilation system for your bathroom. Consider factors such as noise level, energy efficiency, and ease of installation. It’s also important to ensure that the chosen system meets local building codes and regulations.
3. Gather the Necessary Tools and Materials
Before starting the installation process, gather all the necessary tools and materials. This may include a screwdriver, drill, ductwork, vent cover, electrical wiring, and any additional components specific to your chosen ventilation system.
4. Choose the Installation Location
Identify the ideal location for your ventilation system. Typically, it is best to install the fan near the shower or bathtub to effectively remove moisture. Ensure that the chosen location allows for easy access to electrical wiring and ductwork.
5. Cut the Opening and Install the Fan
Using the manufacturer’s instructions as a guide, cut the opening for the fan in the ceiling or wall. Carefully install the fan, securing it in place with screws. Ensure that the fan is level and properly aligned.
6. Connect the Ductwork
Connect the ductwork to the fan, ensuring a tight and secure fit. The ductwork should extend to the exterior of the building to allow for proper ventilation. Use appropriate clamps or tape to secure the connections and prevent air leaks.
7. Install the Vent Cover
Install the vent cover on the exterior of the building to prevent pests and debris from entering the ductwork. Ensure that the vent cover is securely attached and properly sealed.
8. Connect the Electrical Wiring
If your ventilation system requires electrical wiring, carefully connect the wires according to the manufacturer’s instructions. If you are not comfortable with electrical work, it is recommended to hire a licensed electrician to ensure safety and compliance with electrical codes.
9. Test the Ventilation System
Once the installation is complete, test the ventilation system to ensure it is functioning properly. Turn on the fan and check for proper airflow and noise levels. If any issues are detected, refer to the manufacturer’s troubleshooting guide or seek professional assistance.
Frequently Asked Questions about “How to Install a Bathroom Ventilation System”
1. What size ventilation system do I need for my bathroom?
The size of the ventilation system depends on the square footage of your bathroom. As a general rule of thumb, you should aim for a ventilation system that can exchange the air in your bathroom at least eight times per hour. Consult the manufacturer’s guidelines or seek professional advice to determine the appropriate size for your specific needs.
2. Can I install a bathroom ventilation system myself?
Yes, installing a bathroom ventilation system can be a DIY project for those with basic handyman skills. However, if you are not comfortable with electrical work or are unsure about the installation process, it is recommended to hire a professional to ensure proper installation and compliance with building codes.
3. How often should I clean and maintain my bathroom ventilation system?
Regular maintenance is essential to keep your bathroom ventilation system functioning optimally. Clean the fan blades and housing at least once every six months to remove dust and debris. Additionally, check the vent cover regularly for any blockages and clean or replace it as needed. Consult the manufacturer’s instructions for specific maintenance recommendations.
4. Are there any energy-efficient options for bathroom ventilation systems?
Yes, there are energy-efficient options available for bathroom ventilation systems. Heat Recovery Ventilators (HRVs) are designed to recover heat from the outgoing air and transfer it to fresh incoming air, reducing energy loss. Additionally, look for ventilation systems with energy-efficient motors and controls to minimize energy consumption.
5. Can I use an existing ductwork for my bathroom ventilation system?
In some cases, you may be able to use existing ductwork for your bathroom ventilation system. However, it is important to ensure that the ductwork is clean, free of obstructions, and properly sized for the new ventilation system. If the existing ductwork does not meet these requirements, it is recommended to install new ductwork to ensure optimal performance.
Summary
Installing a bathroom ventilation system is a crucial step in maintaining a healthy and comfortable bathroom environment. By following the step-by-step guide provided in this article, you can successfully install a ventilation system that effectively removes moisture, eliminates odors, and improves air quality. Remember to choose the right ventilation system for your needs, gather the necessary tools and materials, and follow all safety guidelines. Regular maintenance and cleaning will ensure the longevity and optimal performance of your bathroom ventilation system.
For professional assistance with bathroom ventilation system installation or any other home improvement projects, contact North Bay Contractors.